
Mother’s Day is almost here, and I thought that I’d make a birthstone bracelet for my Mother-In-Law. I wanted to include the stones for her children, grandchildren & great-grandchildren. I really hope she likes it.

And this is how I made it:
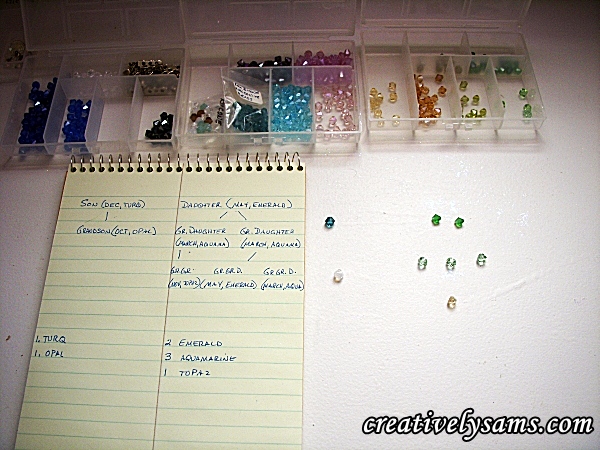
The first thing that I did was make a list of all of her children, grandchildren & great-grandchildren. Once that was done, I chose the stones that would represent the months of their birth.
Once that was done, I needed to choose the metal finish that I was going to use. I know she likes a gold finish, so that’s what I used.
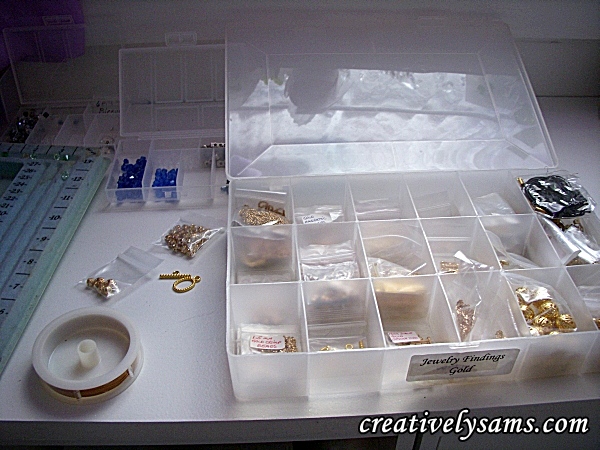
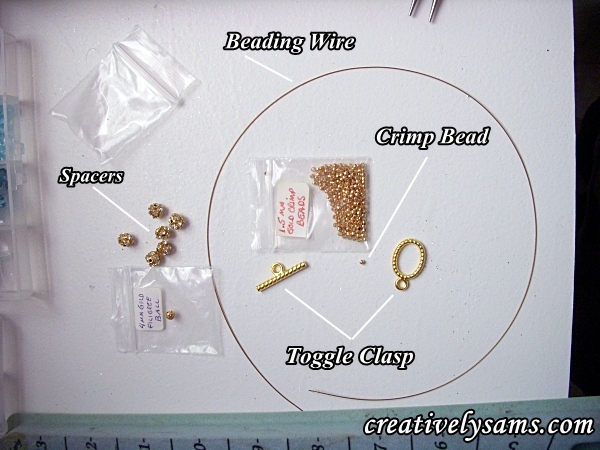
I gathered the supplies that I was going to use.
Beading wire (I used Beadalon Satin Gold Stringing Wire (cut at least 3″ longer than the finished size of the bracelet)
(2) 1.5 mm crimp beads
Spacer beads in 2 different sizes
Birthstones
scissors
needle nose pliers
The average size of a woman’s wrist is 7.5″. She’s petite, so I went with a 7″. (I hope it fits or I’ll be remaking this on Monday)
Don’t know the size bracelet you’ll need? Measure the circumference of the wrist with a fabric tape measure or use a ribbon & measure the ribbon against a ruler.
I cut the beading wire 3″ longer than needed so I’d have room to work with. (Better too long than too short.)
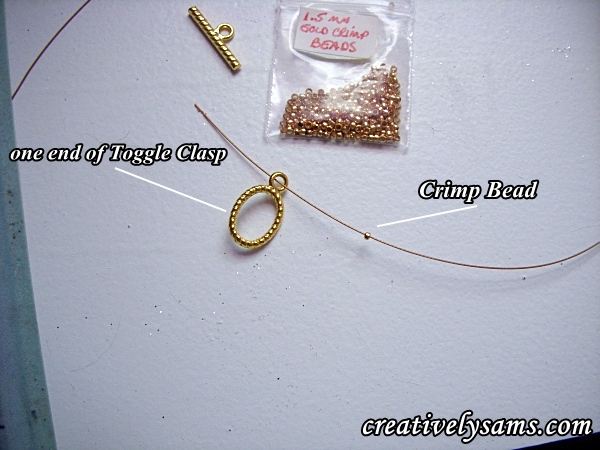
I chose a Toggle Clasp for the closure because it’s easy to use. (you don’t need someone there to help you clasp it)
I knew I’d need 2 crimp beads & some spacer beads. I chose small filigree gold beads & some larger rhinestone studded gold beads.
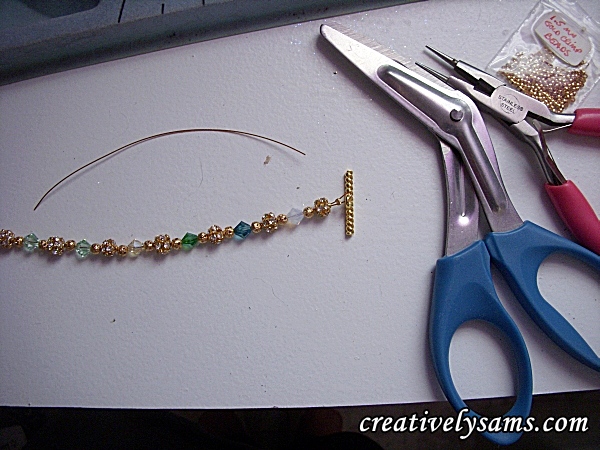
Then I had to plan out the design. This took me awhile. I wanted to space out the colored stones evenly, then fill in with the spacers. But it also had to be long enough to fill the bracelet. (the amount of beads that you’ll use will depend on the size of the bracelet & the size of the beads you use)
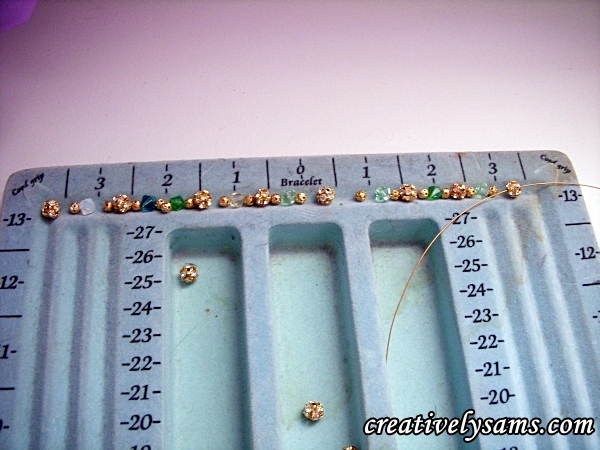
As you can see from the above picture, there were still spaces that needed filled. I kept adding more spacers evenly until the length was right.
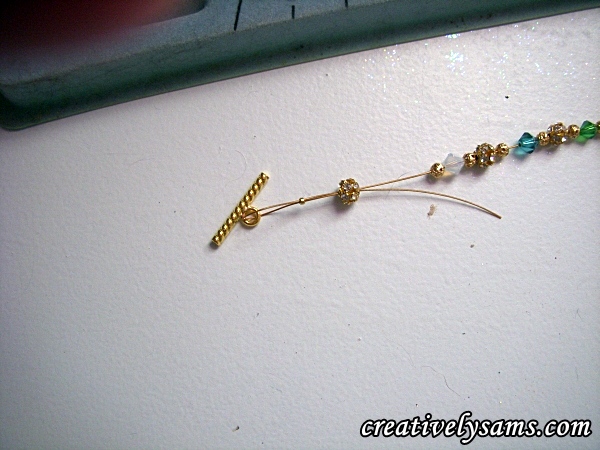
After I was happy with the amount of beads & the design, I got started making the bracelet. First step is threading the wire through one crimp bead & one end of the Toggle Clasp.
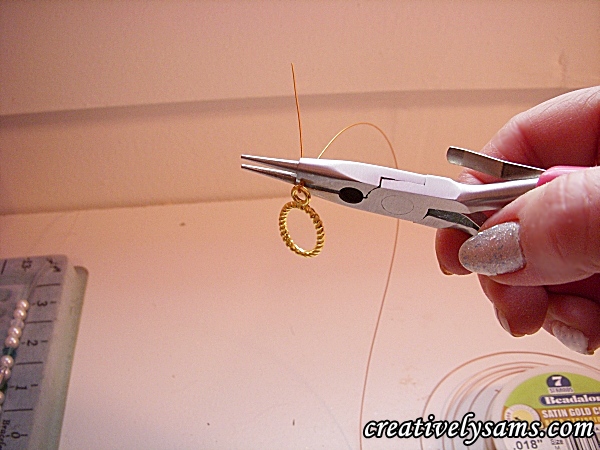
Next step is to thread the end of the wire through the crimp bead, again. Pull the crimp bead up close to the Toggle Clasp.

and then using needle nose pliers, flatten the crimp bead. This will keep the Toggle Clasp in place.
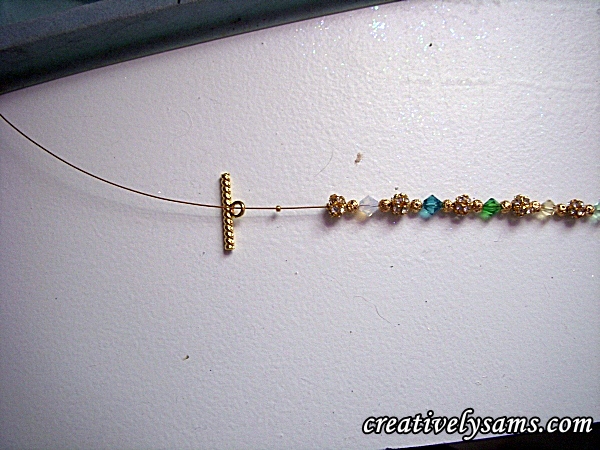
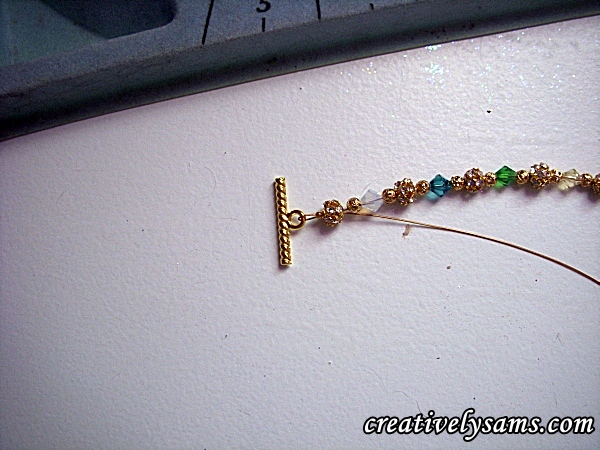
Then thread the beads that you’ve chosen, on to the wire, pushing them up, close to the flattened crimp bead. After all of the beads are on the wire, add the other crimp bead & the other half of the Toggle Clasp.
Thread the end of the wire over the Toggle Clasp & back through the crimp bead
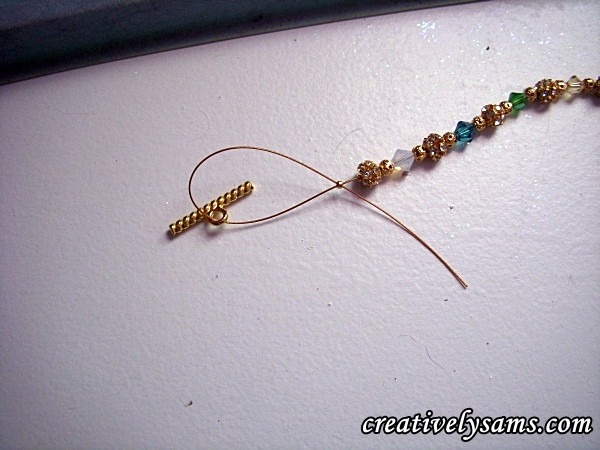
Then thread the wire through the last bead that you’ve put on your wire.
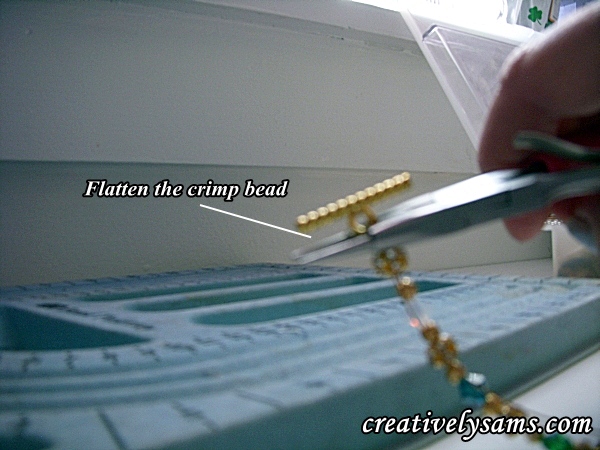
Gently pull the wire so that the beads are snuggle against the crimp bead, but give it a little room. You’ll need enough room to get your needle nose pliers in there.
You’ll notice in the picture above that there is a little ‘wiggle’ room between the Toggle Clasp & the last bead.
Now, using the needle nose pliers, flatten the crimp bead. (sorry the picture turned out so blurry)
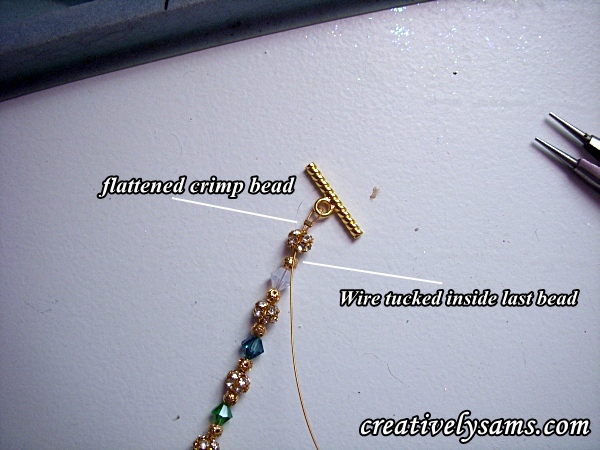
Cut off the excess beading wire.
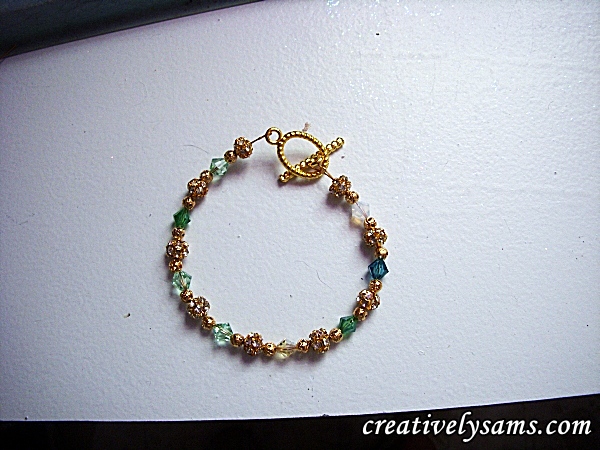
And you’re done!
Now it’s your turn. Just make your list of all the stones that you’ll need, choose the metal finish you want, and create your own!
Happy Creating Everyone!