
I like using canvas bags when I go shopping. Why? They’re sturdier than the plastic bags that the stores offer, most of the plastic bags have holes in them (nothing like chasing your groceries through the store’s parking lot), and I think that when you’re not looking, they reproduce all by themselves. When you use canvas bags, you don’t have to gather them up & take them back to the store to be recycled, like you have to do with plastic.
But… most of the canvas bags have store logos on them or are downright ugly. The nice looking ones can run into some money, and start off heavy, which doesn’t help when trying to lug groceries into the house.
When I was browsing the craft department at Walmart, I found a package of plain white canvas totes. Being the crafter that I am, I got all kinds of ideas in my head & had to grab a package!
I now have canvas shopping totes just for shopping at the craft stores!

This is what the package of totes looked like when I got them:

I’ve been collecting different ‘sayings‘ for a long time. To make my tote bags, I started by printing out some “Glitter” sayings in Microsoft Word.
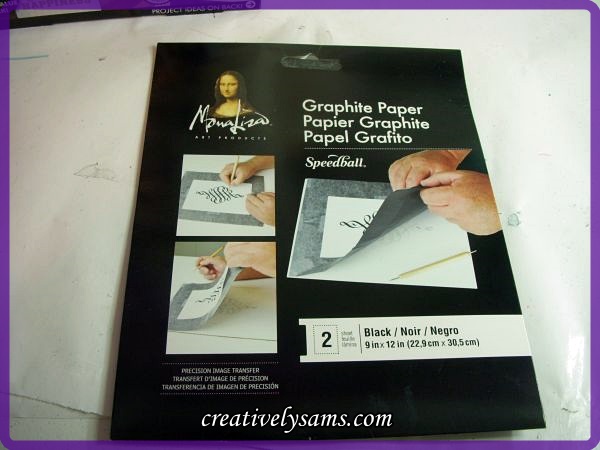
Once I chose the sayings that I was going to use, I slipped a cutting board into the tote. This was to keep the paint from going through to the other side. Then I got out some Graphite paper.
I centered it on to the tote bag & then centered the ‘saying’ on top of the Graphite paper. When I got the saying where I wanted it, I pinned it in place. I probably would have been better off taping it in place, because it left a mark where the pins were. (but I could paint that too!)

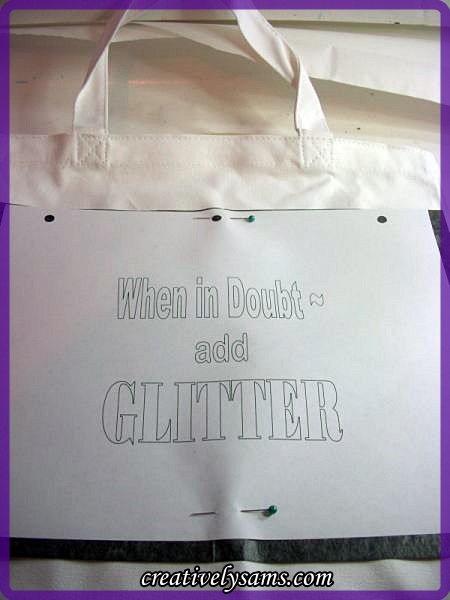
Using a colored pen (so I could see where I had traced) I went over each letter that was on the Microsoft Word document.
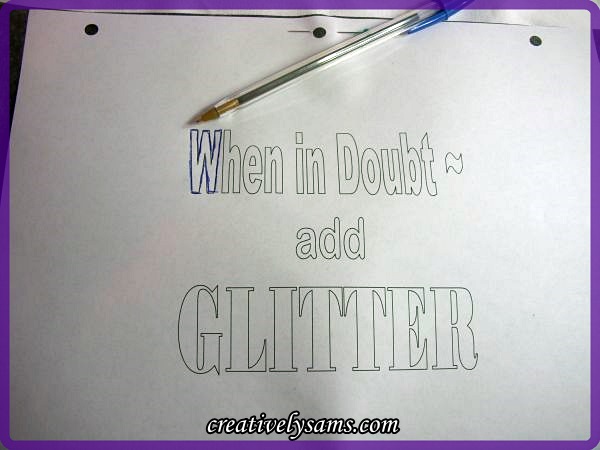
Once I’d gone over all of the letters, I removed the papers. What was left was an outline of the saying.

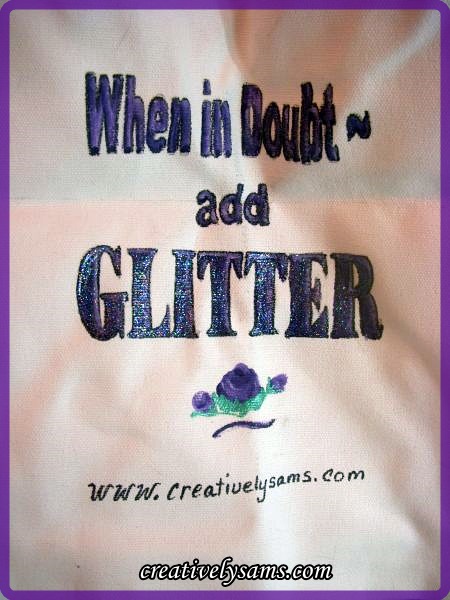
I went over the outline with a black Sharpie. Then I used acrylic paint to paint in the letters. Once the paint had dried, I added glitter fabric paint to the areas that I liked. Set it aside to dry for an hour or so.
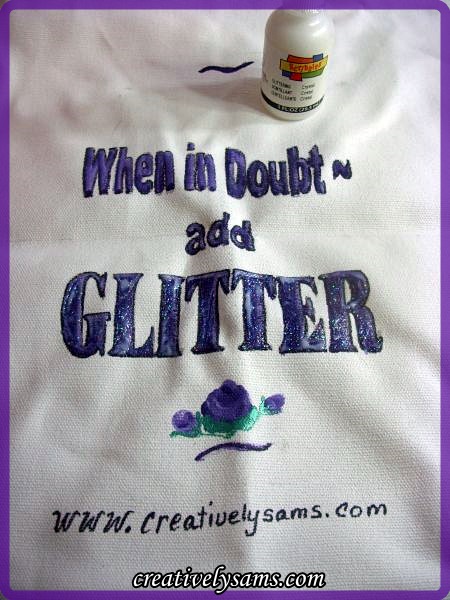
Finished tote:
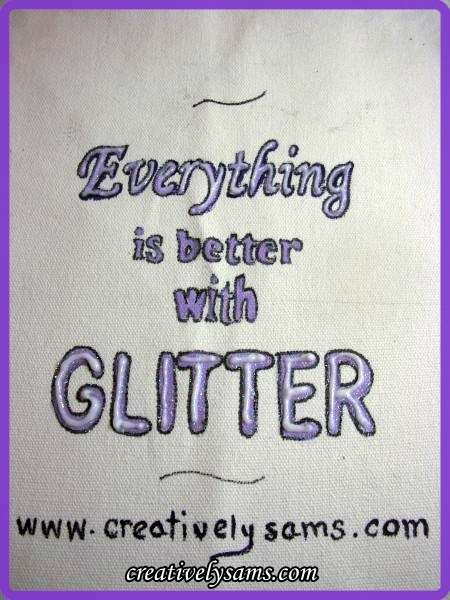
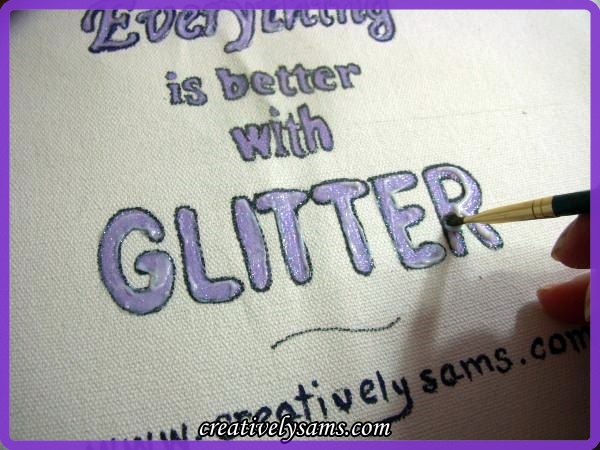
A second tote bag being ‘glittered’. You can fill in the word that you want to glitter, or just run a thick line & then smooth it with a paint brush.

And the second tote complete:

And last but not least, the third tote from the package:
I’ve managed to use them already when I’ve been at the craft stores. They are very sturdy and yet lightweight to begin with. I felt very comfortable using this when I recently got a 12″ mirror. The mirror was on the heavy side & I wasn’t afraid the the bag would break (and give me 7 years of bad luck)
I’ve gotten some very interesting comments on them. too. Mostly, how much they like them & where can they get them.
When you’re working with a blank canvas, the sky’s the limit for decorating! Use your favorite sayings, or your favorite clip art.
They’d also make great “Going To Grandma’s” bags!
Happy Creating everyone!
I’ll be joining:
Coastal Charm for Nifty Thrifty Tuesday #212
Create With Joy for Inspire Me Monday Week 123
Creating My Way to Success for A Round Tuit #205
Cupcakes & Crinoline for Project Inspire{d} #66
Kathe With an E for You’re Gonna Love It Tuesday
Our Delightful Home for Show Me What You Got Linky Party #118
The Dedicated House for Make It Pretty Monday – Week 100
A Stroll Thru Life for 216th Inspire Me Tuesday
Ivy & Elephants for What’s It Wednesday #119