
I’m still longing for the beach. So, making shell crafts seems natural to me. and I love Christmas. I’m making Shell Angles today! I constantly think about all of the joy & sparkle that the Christmas season brings. (I wish that feeling could last all year long) So, combining the two makes sense to me. Makes sense to you, too, doesn’t it? (I know it’s only July, but haven’t you ever heard of Christmas in July?) 🙂
Angels are always part of my Christmas decorating. It was an angel that brought the good tidings to Mary.

This is a long post, because it’s loaded with step by step pictures. I will apologize now for some of the blurred pictures. I’m still trying to master the macro setting on my camera. I’m also showing how I make all of the parts before I put them together. It’s so much easier when you’re making multiples to do it like an assembly line.
What you’ll need:
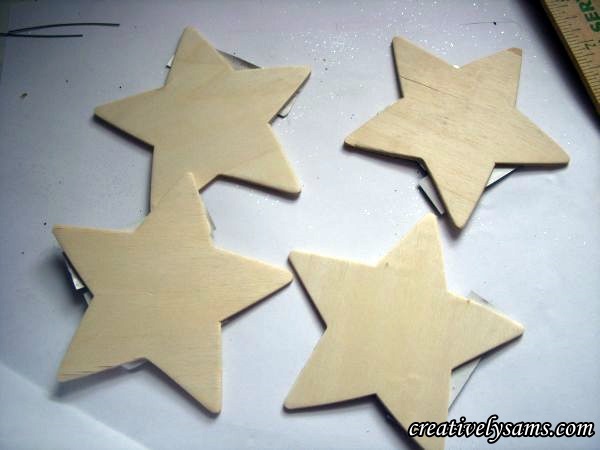
Wooden Stars (mine were about 3 1/2″ wide)
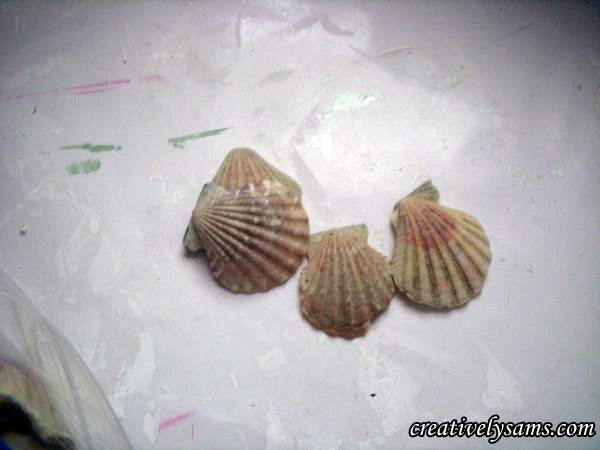
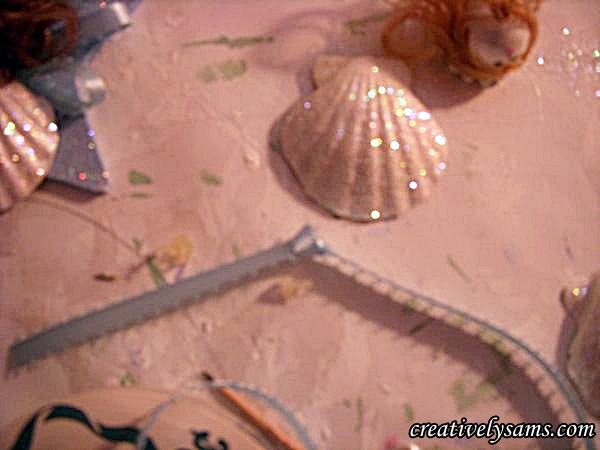
Shells (Scallops)
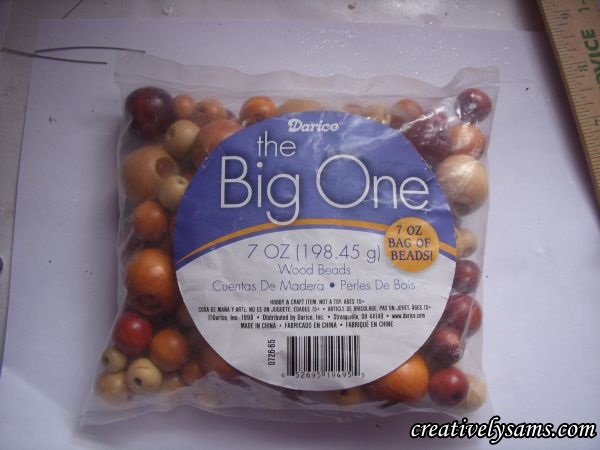
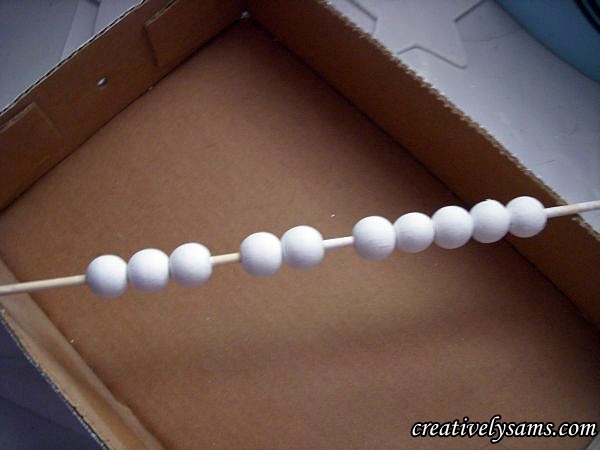
Wooden Beads (I got the large assorted bag, it’s cheaper & leaves me a lot of sizes for other projects)
Pearls (the kind that are already strung, or you could always string your own)
Doll hair
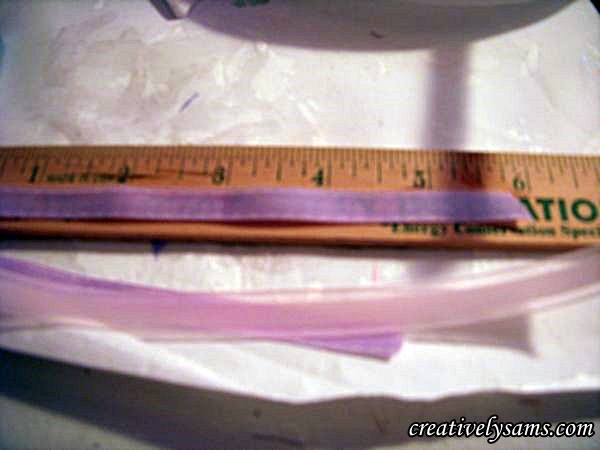
Ribbon (cut into 6″ lengths) +
fishing line (to hang the Shell Angel Ornament) (cut in 10″ lengths and knot the ends together)
Paint:
White acrylic
Pastel acrylic
White pearl acrylic
Black acrylic paint (for her eyes & nose)
Red or Pink acrylic (for her mouth)
Round toothpicks
scissors (to cut ribbon & toothpicks)
paint brush
hot glue gun & glue sticks
white tacky glue
GLITTER! (white iridescent)
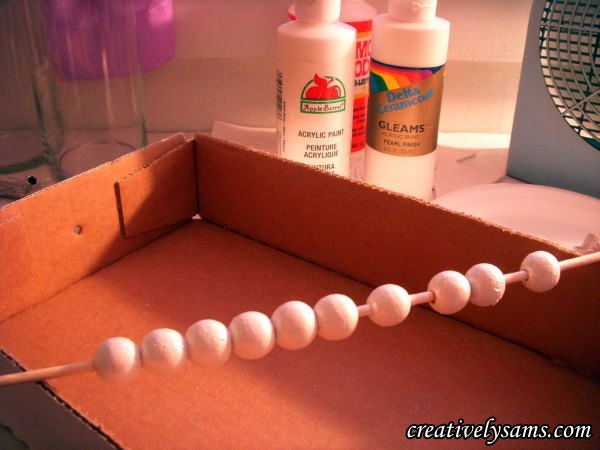
First, base coat all of your pieces with white acrylic paint. (You need one for each angel that you’re making) Set aside to dry. (I put the beads on a skewer to make it less messy when I was painting)
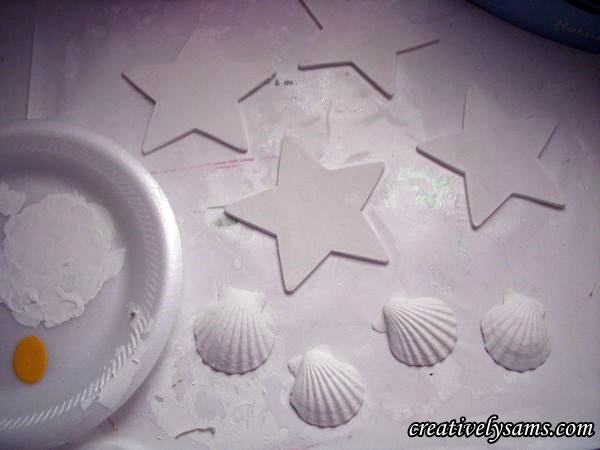
Then I painted the stars with the pastel paints that I wanted & then I painted the stars & the beads with the white pearl acrylic (pearls, shells, get it?) 😉

Now we add the glitter to the stars & the shells. Paint the stars & shells with a coat of white glue & shake on the glitter generously. I always add glitter to my items over a creased piece of paper. The crease makes it easier to pour the glitter back into it’s container.
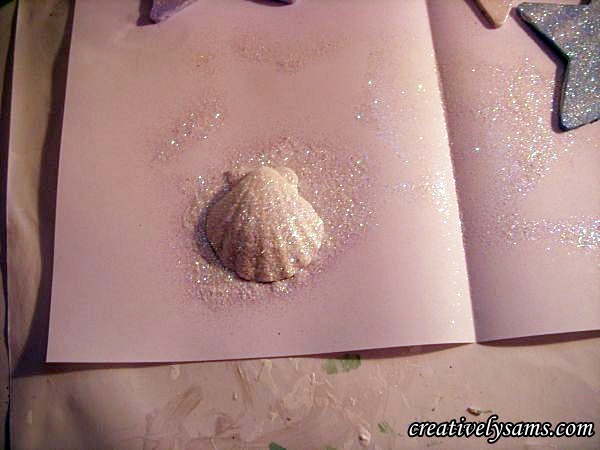
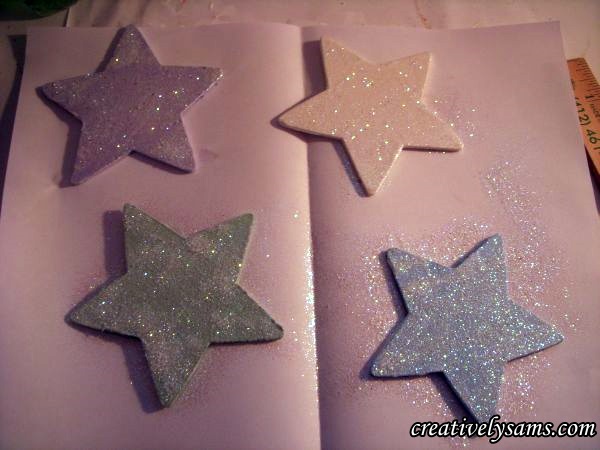
Set them aside to dry. Once the glue is dried, shake off the excess glitter & put it back in it’s bottle. (You don’t want to waste any) Set the pieces aside. On to the next step!
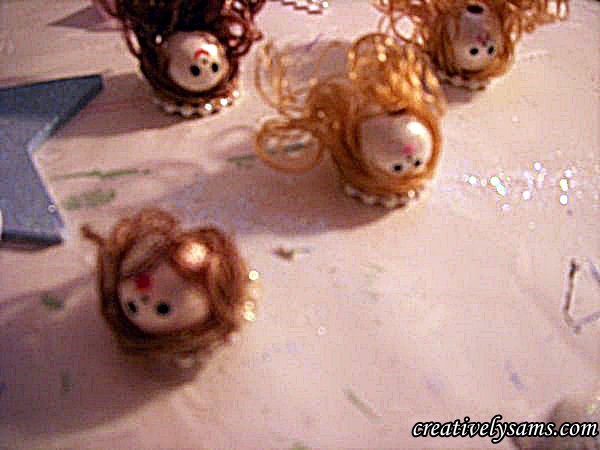
Making the faces: Using the scissors, cut off one end of your round toothpicks. I used 2 toothpicks so the paint wouldn’t get mixed together. You’ll be using these to make the faces on your Shell Angels.
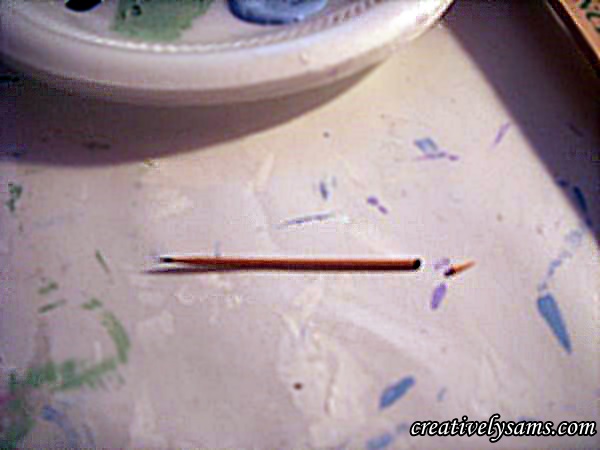
Dip one cut end into black paint & dot it in the center of the bead. Repeat next to it. (always put the eyes in the center of the bead. Too high looks odd & too low looks sad) With the pointed end, make the nose by placing a dot between & a little lower than the eyes.
Then with the other toothpick, use the cut end & dip it into the red or pink paint to make the mouth. If you want a smile, use the pointed end to draw the smile on. (hmmmm…. looks a little like a snowman face, that’ll be in another post) Set aside to dry.
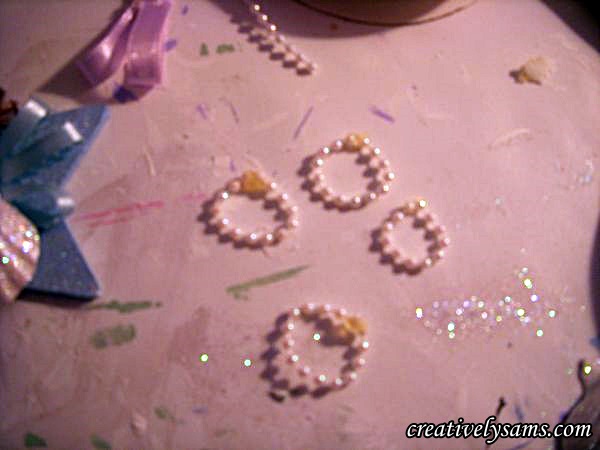
 Making her halo: cut pieces of the pearl strings about 15 pearls long. Put a drop of hot glue at one end, bring the other end around to form a circle & push the other end into the glue. Hold it there for a second or two until it dries. Set aside.
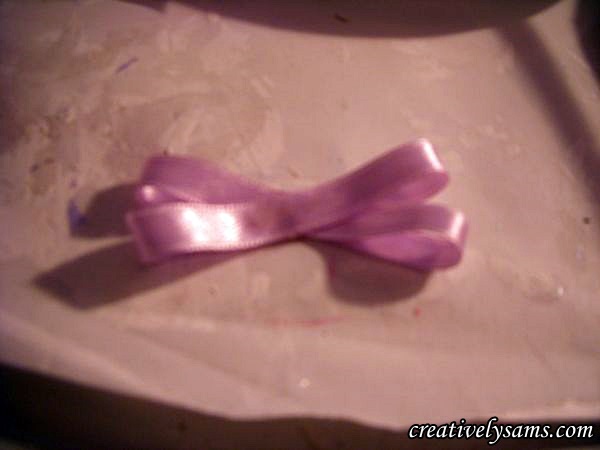
Making her wings: Cut pieces of ribbon in 6″ lengths. You’ll need 2 or 3 depending on how wide the ribbon is. (The blue was 5mm, so I used 3, the pink was wider, so I used 2) The thinner the ribbon, the more lengths you’ll need.)
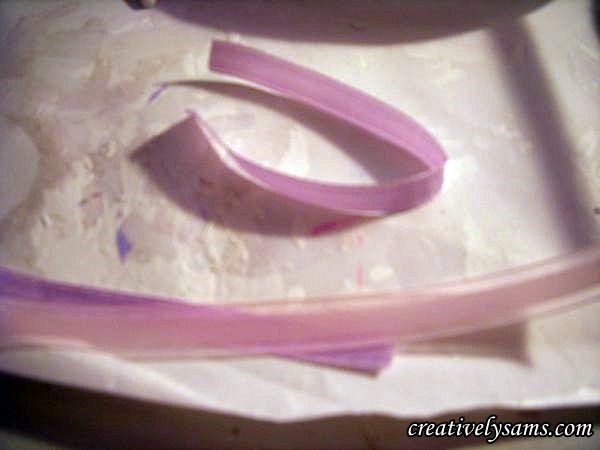
Next, use your finger to crease the center of the ribbon. Add a thin line of hot glue across the crease and bring the ends to meet at the center. After you’ve made the amount of ribbon wings you need, layer them on top of each other, at a slight angle using a tiny drop of hot glue. Set the wings aside.
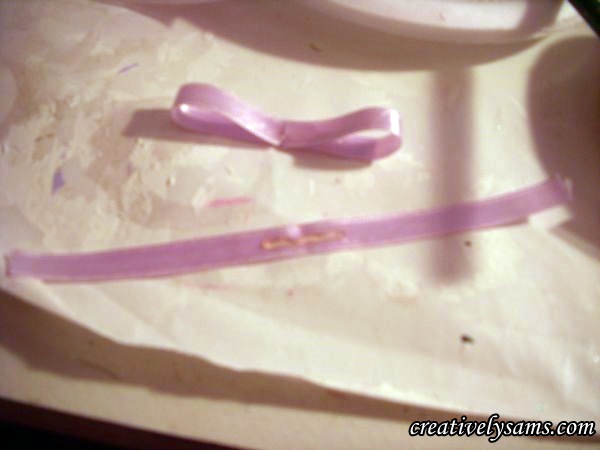
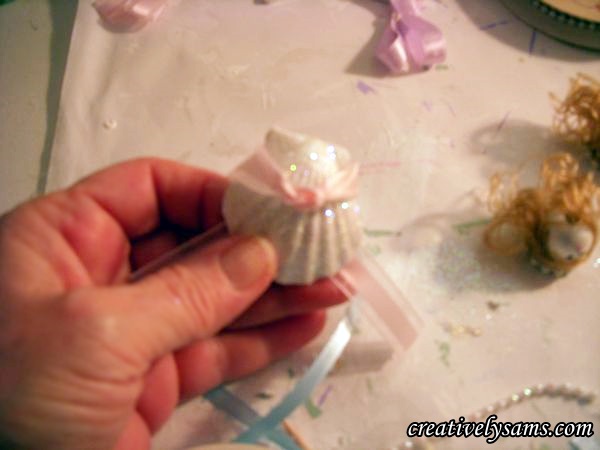
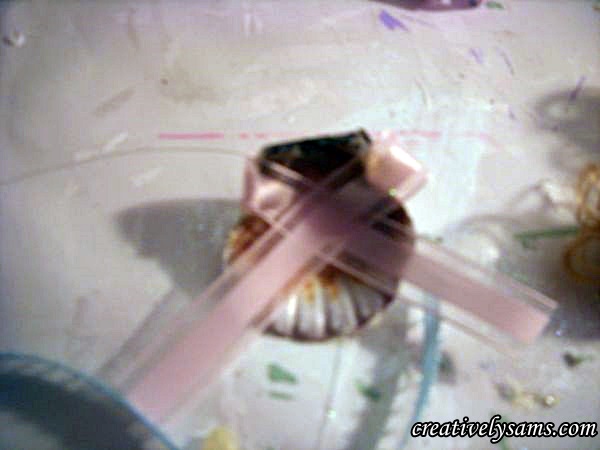
Making her arms: Take another 6″ piece of ribbon, (the same that you used for her wings) and tie a knot in the center. (The knot makes her hands) Hold the knot in the center of the glittered shell & glue the ends to the back of the shell. Once the glue has cooled, clip off the excess ribbon. Set aside.

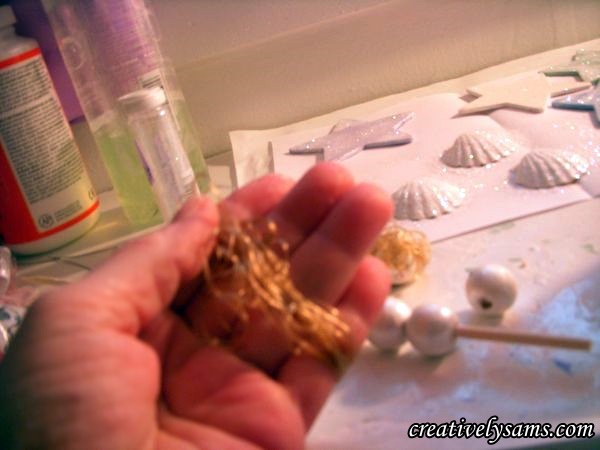
Adding her hair: Curly Hair comes in long strands. Don’t worry if you can’t find the end. Just cut off a section and start to wrap the hair around your fingers. I wrapped it about 5 times, give or take a little. Put a large glob of the tacky glue on the top of the head bead & hold the hair in place for awhile. (I held it for at least 2 minutes) Once it starts to hold to the head bead, you can put it down & continue onto the next step.

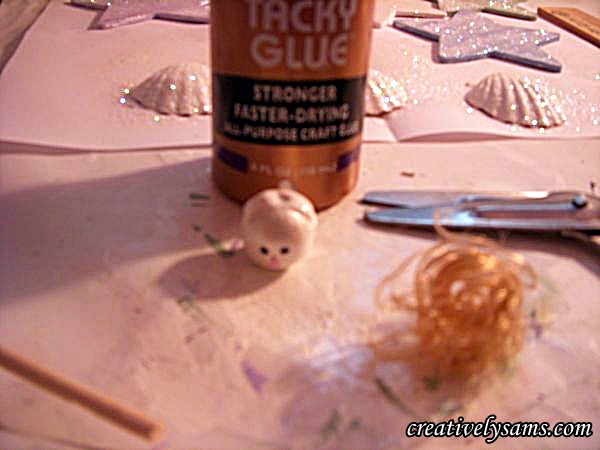
Applying the Halo: After the hair has dried, or at least staying where it should, apply a thin line of hot glue to the pearl halos & turning the head bead upside down, push the bead onto the halo. Set aside.
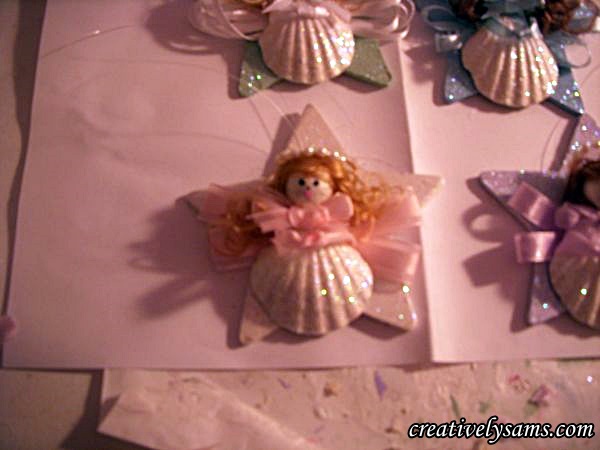
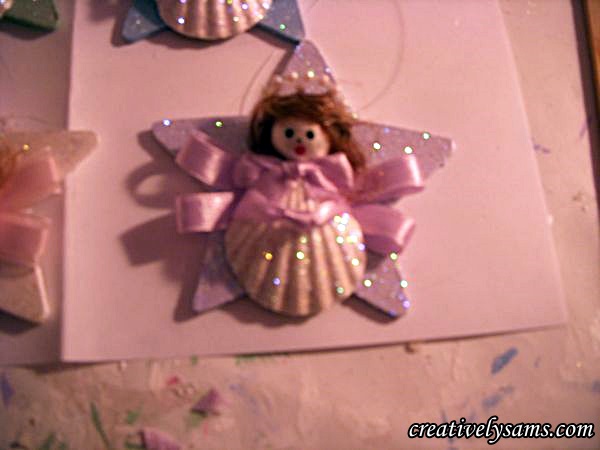
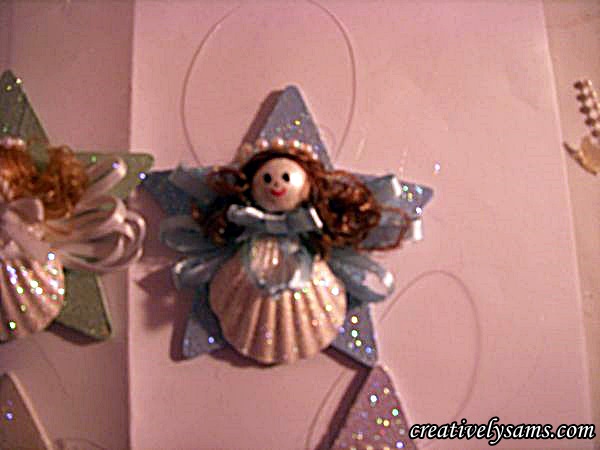
All of your pieces are done! Time to put her together!
Glue on the Ribbon Wings & the knotted end of the fishing line to the center of the Wooden Star, making sure that the loop of the fishing line is facing the top of the star .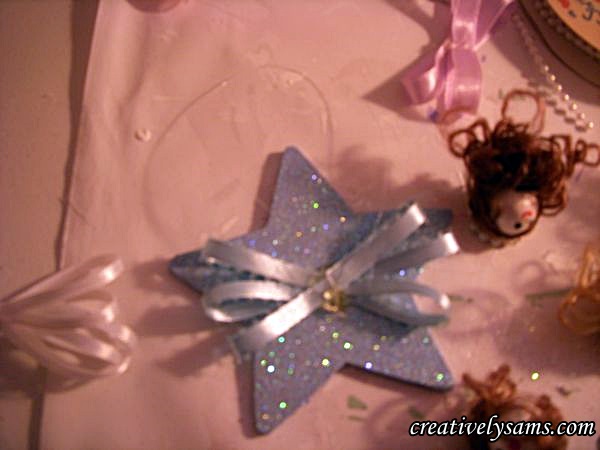
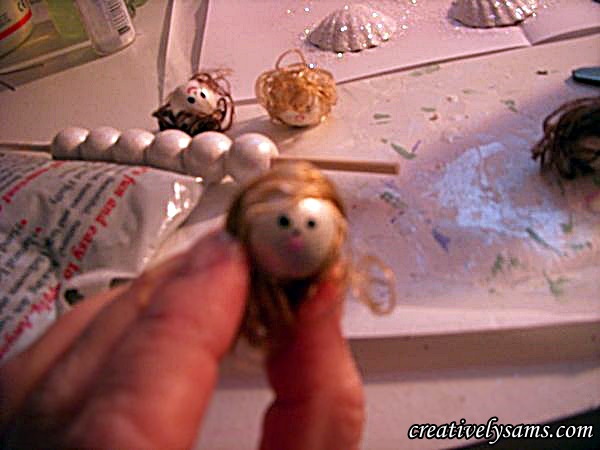
Glue on the shell to the bottom center of the ribbon rings & add a large puddle of hot glue to just above the shell for the head.
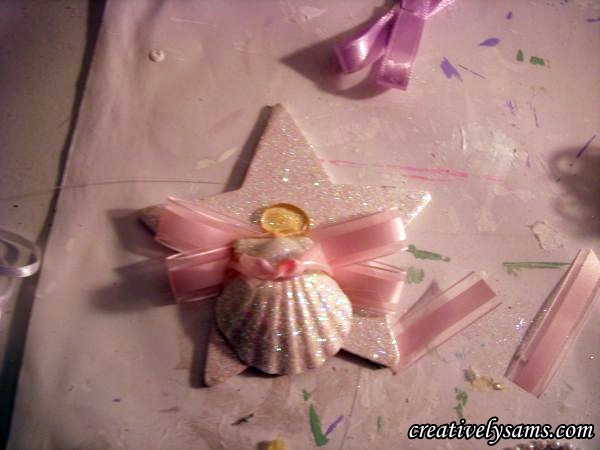
Press the head into the puddle of glue.
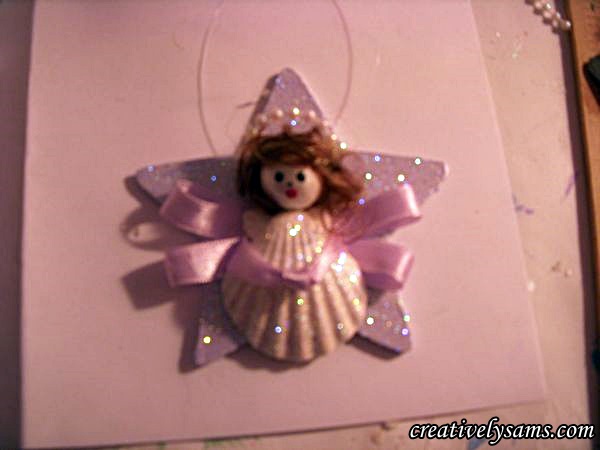
I didn’t like the space between the shell & the head, so I made a little bow out of the same ribbon & glued it under her chin at her neckline. You could use a ribbon rose or a small string of the pearls.
And she’s done!

A lot of steps, I know, but she’s so worth it. I love the way she shimmers.
Looks like I’ve got a few special Christmas ornaments for friends & family.
Happy Creating everyone!