Painted Flatware

Painted Flatware

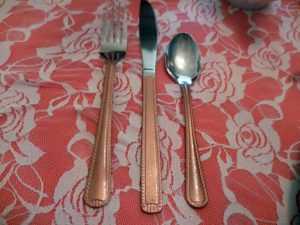
By now you know me well enough to know that if I don’t have what I need, I make it.  I wanted some copper colored flatware for a Fall tablescape.  I couldn’t believe how expensive it was!  $54.00?  I don’t think so… I made mine for $2.64.

I found some plain silver flatware at Walmart.  They had 4 packs for  $.88 each so I got a pack of knives, spoons & forks.  I washed & dried them, but in hind site, I should have used an S.O.S. pad to roughen up the surface.  Live & learn.

Then using painter’s tape, I taped off everything that I didn’t want painted.  I used 2 coats of metallic copper paint & 2 coats of Krylon’s Triple Thick clear glaze on both sides.
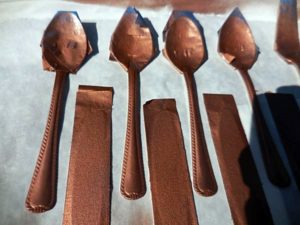
Painted Flatware

I love the way they turned out, and it was just what my tablescape needed.

Let me know what you think!
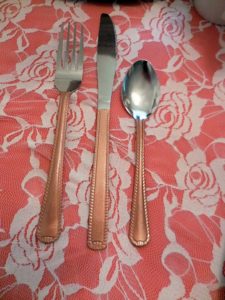
Painted Flatware

Happy Creating everyone!

If you want to see how I did this:

Thanks for watching!


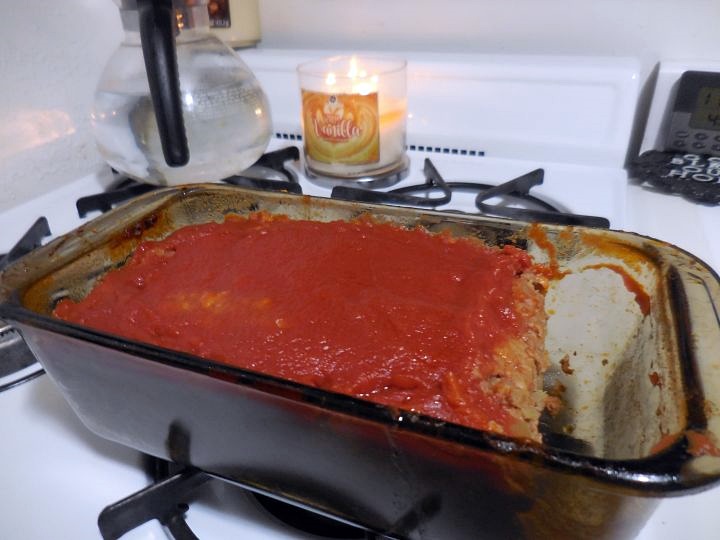
Microwave Meatloaf

Microwave Meatloaf

This is a quick & filling main dish that cooks up in 15 minutes.  This meatloaf recipe is moist & flavorful and is always a hit with the men in the family.

In a large bowl, mix together:

1# ground meat

Minced Onion – cooked & drained

Diced Celery – cooked & drained

Oatmeal

Eggs

Onion powder

Garlic powder

Sage

Miracle Whip

Catsup

Place in a glass loaf pan

Mix together in a small bowl:

Tomato Sauce

Catsup

Add to top of meat mixture

Sprinkle with Oregano (Optional)

Cover with Waxed Paper

Microwave for 15 minutes (Roast setting, between medium & high)

Serve

To see how I made this, click on the link below and subscribe!

Happy Creating everyone!


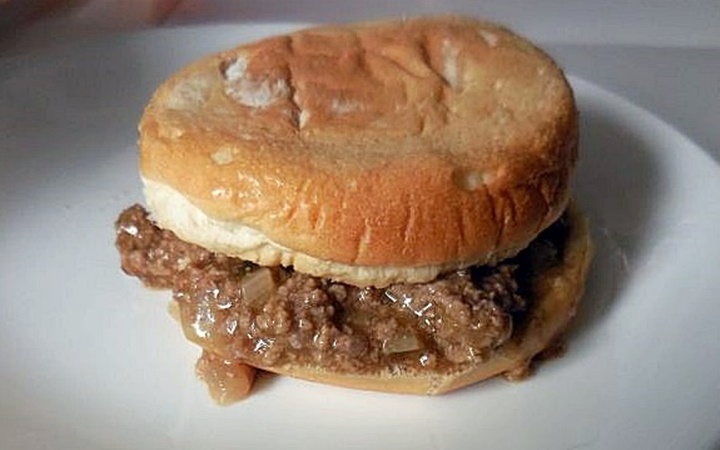
Cheddar Cheese Sloppy Joes

Cheddar Cheese Sloppy Joes

You’ll need:

1# Ground Beef

1 medium Onion (diced)

1 can of Cheddar Cheese Soup

1/2 can of water

1 Tbs. Sweet Relish

Hamburger Buns

Brown ground meat & onions until onions are translucent.

Add soup, water and relish.

Stir well

Simmer on low flame until thickened.

Serve on upside down buns

Enjoy!

To see how I made these:

Happy Creating everyone!

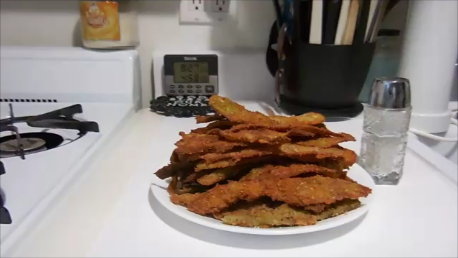
Breaded Fried Zucchini

This is a little treat that I make for myself once a year.  I don’t normally eat fried foods, so this is eagerly awaited.  It’s easy to make and can be served as a side dish or a snack.  I hope you enjoy it.

Breaded Fried Zucchini

What you’ll need:

Zucchini

Bread Crumbs

Eggs (beaten)

Vegetable Oil

Large Pan

Peel the zucchini.  Then continue to peel the meat of the Zucchini.  Set aside.

Heat Vegetable Oil:

Dip the Zucchini slices in the beaten eggs, then into the bread crumbs on both sides.

Brown on both sides.

Drain on Paper Towels.

Serve and enjoy.

Happy Creating everyone!

To see how I made this, click on the link below & please subscribe to my new YouTube channel!


Grandma’s Chicken Noodle Soup

In my younger years, I went on a quest to gather as many family recipes that I could.  This recipe was given to me by my Dad’s sister, Aunt Emma, years ago.  It was her mother’s recipe.  I’ve tweaked it a little bit, but it’s basically my Grandma’s recipe.  Enjoy!

You will need:

One whole chicken

Diced veggies, (celery, carrots, onions)

One pkg. of Chicken Broth

One can of mushrooms

Spices, (basil, parsley flakes, onion powder & garlic powder) and water.

1# bag of Noodles

Remove the giblets from the chicken & rinse the chicken with cold water, inside & out.  Place in the bottom of the pressure cooker & add the giblets.  (heart & liver)

Add mushrooms, diced veggies, can of chicken broth, spices & water to the fill line.

Put in Pressure Cooker for 20 minutes. After the 20 minutes is up, cool down the pot with cold water, remove the valve & then remove the lid.

Remove the chicken from the pot.  I usually put it into a strainer over a bowl so I don’t lose any of the broth.  Remove the giblets.  Let cool.

Boil the noodles, rinse them & set them aside.

Once the chicken has cooled down enough to handle with out burning your fingers, remove the skin.  Then remove the chicken meat from the bones.  I like the texture of tearing the meat as well as cutting it into cubes.  (watch out for those tiny bones!)

The broth is a little cooled by this time.  Veggies are tender.  Add the chicken pieces to the broth.  Stir in the cooked noodles.

The only thing left to do is serve and enjoy!

Happy Creating everyone!

To see how I did this, click on the video & subscribe to my new YouTube channel!

Blender Potato Pancakes

Blender Potato Pancakes

2 eggs

2 tbs. milk

2 tbs. melted butter

2 tbs. flour

¾ tsp. salt

1/8 tsp. pepper

¼ small onion, sliced

2 cups peeled raw potatoes, diced

Add eggs, milk, butter, flour salt, pepper, onion & 1 cup potatoes to the blender. On the blender’s MIX setting, mix for 5 seconds.

Add remaining 1 cup of potatoes & Mix for 8 seconds or until coarsely chopped.

For each pancake, pour ½ cup mixture on hot well-greased griddle & spread into a 4” cake.

Brown on first side, turn & brown on second side.

Makes about 2 cups – 8 pancakes

Original Recipe:

Sears Blender Instructions & Recipes

To watch how I made this, click on the link below!  And subscribe to my new YouTube channel!

Happy Creating everyone!

Blender Apple Muffins

I’ve been making these Apple Muffins for years & my guys love them.  They’re easy to make & are good for breakfast as well as packing easily in lunches.

Blender Apple Muffins

2 cups sifted flour

½ cup sugar

3 tsp. baking powder

1 tsp pumpkin pie spice mix

¾ tsp. salt

¼ cup melted shortening or cooking oil

2 eggs

1/3 cup milk

1 ½ cups coarsely chopped unpeeled apple

Sift flour, sugar, baking powder, pumpkin spice & salt into mixing bowl

On the STIR setting, mix shortening or oil, eggs, milk & apple for10 seconds or until apple is finely chopped.

Pour over dry ingredients.  Stir just until dry ingredients are moistened.

Fill greased muffin pans ¾ full.

Bake 400º

20 minutes.

Makes 12 muffins


Original Recipe:

Sears Blender Instructions & Recipes


A Mother’s Day Tablescape

It’s been a long time since I’ve done a tablescape, and to be honest, I’ve missed doing them.

I honor of Mother’s Day, I’ve done a tablescape using the china & gold silverware that my Mother-In-Law gave me.  It’s absolutely gorgeous & I’m so grateful for it.

Mother's Day Tablescape

I started with a pink tablecloth (which is actually a pink twin sized sheet, cut to fit) and added a layer of lace to tone it down a bit.

Because the china is trimmed in gold, I used a gold charger as a base.  I used white napkins so it didn’t detract from the china.

A Mother's Day Tablescape

The napkins are held with silver & gold napkin rings to tie in the gold.

Silver & Gold Napkin Rings

I kept the centerpiece simple, using a small serving platter to hold the tea pot with the creamer & sugar bowl on either side.  A little pink table scatter finished it off.

A Mother's Day Tablescape

I added my favorite Wexford glasses.

Wexford Glass

And added the Water Jewels Centerpiece to the little corner of the dining area.  To see how I made this, click on the blue link.

Water Jewels Centerpiece

To see the tablescape, click on the video.  To make sure you don’t miss another post, subscribe to my new YouTube Channel!

I hope you enjoyed my Mother’s Day Tablescape.

Happy Mother’s Day and Happy Creating everyone!

I’ll be joining:

Between Naps on the Porch for Tablescape Thursday


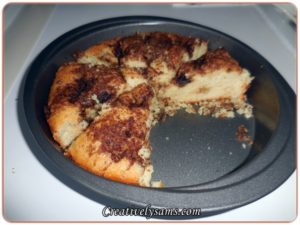
Quick Coffee Cake

I’ve been making this recipe for Coffee Cake for years.  It’s so easy to make & doesn’t take very long.  The hubby likes it & it packs well in lunches.  I hope you enjoy it.

What you’ll need is:

Quick Coffee Cake

3 tbsp. softened butter

½ cup sugar

1 egg

1 cup flour

1 ¼ tsp. baking powder

1 ¼ tsp. salt

1/3 cup milk

¼ tsp. vanilla

1/3 cup brown sugar (packed)

½ tsp. cinnamon

½ tbsp. butter (cubed)

Mix 3 tbsp. butter with sugar.

Add egg & beat until creamy.

Mix flour, baking powder & salt thoroughly

Add sugar mixture alternately with milk.

Add vanilla.

Spread batter evenly in a greased, 8” square baking pan.

Mix brown sugar & cinnamon & sprinkle over batter.

Dot with 2 tbs. butter.

Bake 350º

25 – 30 minutes

Quick Coffee Cake

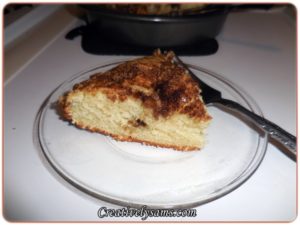
Hubby’s first slice.

Quick Coffee Cake

To watch me make this recipe click on the video, and subscribe to my new YouTube Channel!

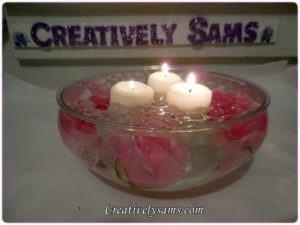
Water Jewels Centerpiece

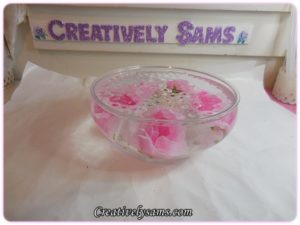
Some of my favorite centerpieces have been made using Water Jewels, sometimes called Water Gems.  They are tiny dehydrated pellets that when soaked in water, they swell up into what looks like clear marbles.  They’re squishy & bouncy and when water is poured over them, they become invisible, which makes easy designs using flowers.

Water Gems Centerpiece

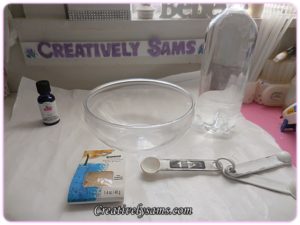
The supplies for this centerpiece are, Water Jewels (got them at Michael’s), a clear container that will hold water, flower heads, water, measuring spoon, water & some candles.

Water Jewels supplies

After they gems have swollen in the water (about 6 to 8 hours) you can tuck flower heads down into the beads.  Top with water to watch them ‘float’ in the water, because the gems become clear.

Water Gems Centerpiece

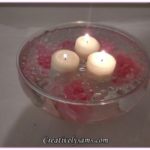
Add candles to the top of the beads.  They keep the candles in place.  Light the candles & your centerpiece is complete!

Water Gems Centerpiece          Water Gems Centerpiece

This centerpiece can be customized for any tablescape, simply by changing the colors of the flowers used.

It would make lovely centerpieces for weddings, baby showers or any ‘special’ dinner party.

(Water Jewels will dehydrate if you don’t add more water to them.  You can add a few drops of Essential Oils to the water to make them into a room freshener.  When they are no longer being used, store them in a gallon sized Ziploc bag.  If you don’t want to store them, mix them into your garden soil to help keep the ground moist when the rain is scarce, DO NOT let them go down your drain!).

To see how I made this, watch the video!  If you like the video, please subscribe to my new channel.

I hope you enjoyed this.

Happy Creating everyone!