Valentine’s Tablescape 2020

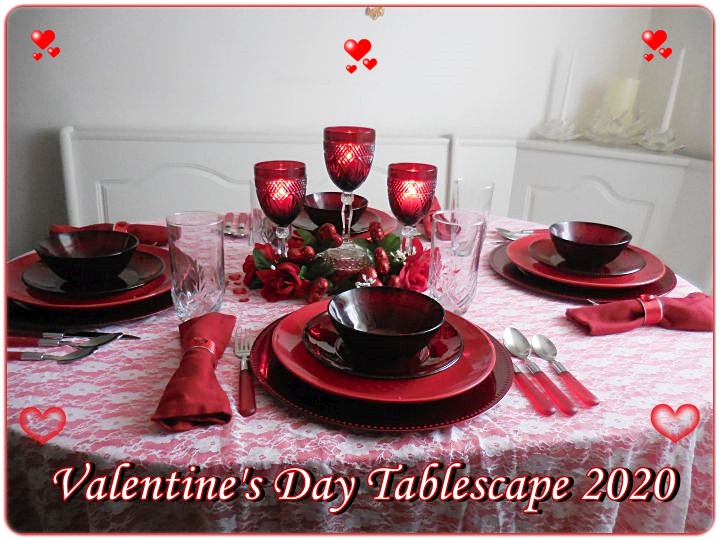
Happy Valentine’s Day!

This is this year’s Valentine’s Tablescape. I had a lot of fun putting this one together.

I stayed with reds this year. The base is a red tablecloth covered with white lace to break up the red.

Starting with a red charger that I had gotten at Michaels, years ago. I added a red dinner plate from the Dollar Tree. The salad plate & bowl are from Better Homes & Gardens that I’ve had for over 20 years. The flatware I believe I got at Ollie’s. The napkins are from Walmart & the napkin rings were made using satin ribbon, heart gems added to a Dollar Tree silver napkin rings.

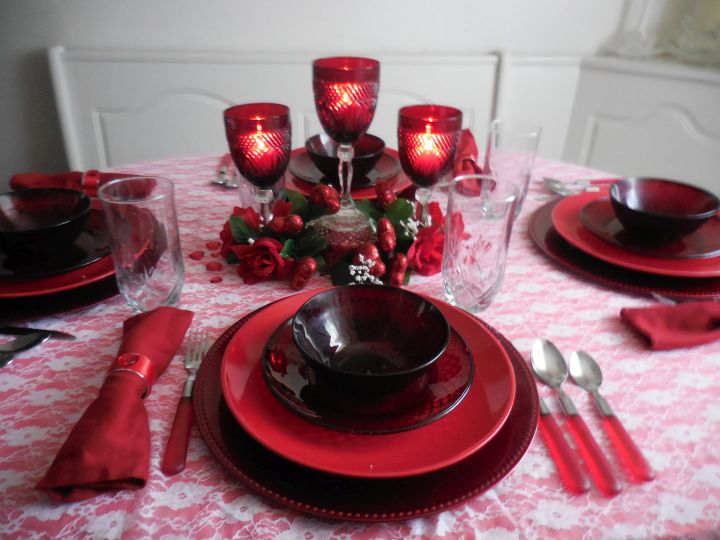
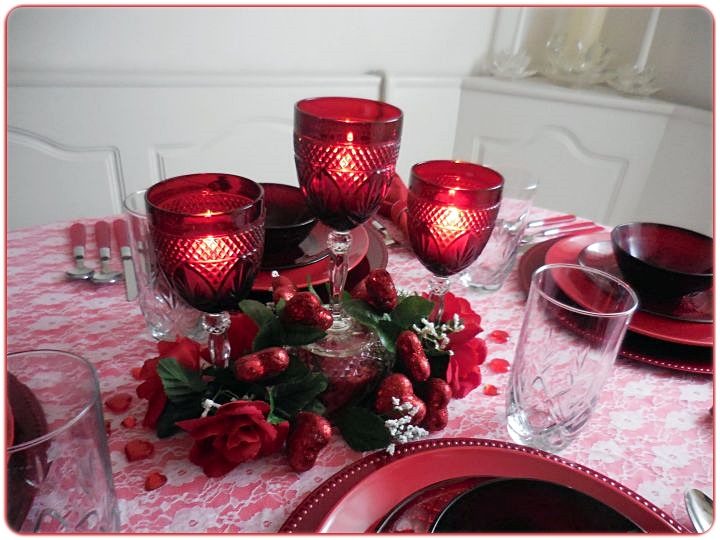
The centerpiece is made from 3 goblets that are from the BH&G set. I glued the center goblet on to a crystal bowl to give it height. The bowl was filled with red roses. I surrounded the bowl & goblets with red roses & glitter hearts. Red glass heart scatter & rhinestones were added to give it a little ‘bling’. I love the way the diamond pattern of the goblets light up when the candles are lit.

To see this tablescape, please click on my YouTube channel & don’t forget to subscribe (It’s free) so you don’t miss any of my posts.

Happy Creating everyone!

Red & Zebra Tablescape

By now, you know how much I love Zebra.

It’s so hard for me not be drawn to anything with a zebra pattern.  I love the graceful lines of the pattern, and the black & white contrast makes adding color to it so easy.

I used the same centerpiece, place mats & coasters that I used in my Zebra Tablescape.

I hope you like this week’s tablescape.

Red & Zebra Tablescape

Continue reading

Valentine Love Tablescape

Valentine’s Day is only a week away, and it’s such a romantic time for me.  That’s the day that the love of my life proposed to me.  When I think of Valentine’s Day, it’s always filled with hearts & love.  I thought this week’s tablescape should be filled with those.  This is my Valentine Love Tablescape:

Valentine Love Tablescape

Continue reading

Valentine’s Day Napkin Rings Alternative

Not enough time to make your own napkin rings?  No problem. Even if you have no time at all to cut, measure or sew, you can still use napkin rings to finish off your Tablescapes.

I found these Wilton ‘engagement ring’ Party Favors at Michael’s in the wedding section. (It seemed fitting, since that’s the day that my husband proposed to me.)

Just slip them onto the napkins to add a little bling!

Still no time to go out and purchase the Wilton Party Favors?  No problem. Tie some ribbon around your napkins.  Or wrap your napkins with some holiday garland.  It’s not hard to create a pretty tablescape. Just use your imagination!

Now, that was easy!

Valentine’s Day Place Setting

I love to decorate for the holidays. Especially the dinner table.  Making the items makes it unique.  I’ll show you how to do it too!

A diy place setting

Items you will need:

1 yard of patterned fabric

1 yard of solid colored fabric

1 spool of ribbon (my spool was 7/8″ wide by 9 feet long)

measuring tape

sewing machine  & thread & pins

scissors

brown craft/packing paper (to make the pattern)

I start all of my patterns using brown craft/packing paper.  It’s better to make a mistake on paper than on your fabric.

starting your pattern

Measure 17 1/2″ by 12″.  That’s the size that works for me, but you can adjust it to fit your needs.

Then measure 2″ from the corners and mark.  Draw a line to connect the marks.

Repeat on all 4 corners.  Cut off the triangle pieces that were your corners.

I used 2 yards of fabric for 4 place mats. One yard of patterned fabric & one yard of solid fabric.

Cut out 4 place mats from the patterned fabric:

Cut out 4 place mats from the solid colored fabric:

Add some decorative ribbon to the solid side of the place mat piece:

To get an idea of where I wanted the ribbon placement, I laid the silverware out on it:

Then I added 1/4″ inward form the side to allow for the seam allowance. Mine was 4 1/2″ in from both sides.

Pin the ribbon in place & sew in place.

After sewing the ribbon in place on all 4 place mat pieces, pin the right side (good side) of the solid fabric to the right side (good side) of the patterned fabric together.

Stitch around the place mat pieces, leaving an opening large enough to insert your hand to turn the place mat right side out.

Turn place mat right side out.  Press & pin the opening (that you left opened to turn).  Top stitch about 1/4″ all the way around. That will keep the edges crisp & the opening closed. Clip your threads off.  It’s now ready to use!

That’s all there is to it!  Have fun & choose the fabric that will match your decor.